Friday, September 15, 2017

Chrysler Diagnostic Tool V17.03.01 wiTech MicroPod 2

This version of Chrysler wiTech MicroPod 2(17.03.10) works fine on Windows 7 and Windows 10.
What is advantage of new software version V17.03.01?
wiTech software with database?
No. there is no wiTech programming database. So, it cannot support offline programming.
Work OK with all the wiTech 2 clone?
No! Clone wiTech 2 mainly includes three versions: Sp271, Sp271-B, sp271-c. Software above only can be used with wiTech 2 diagnostic tools with the item no. Sp271-B. Software cannot work with Micropod2 SP271 or SP271-C.
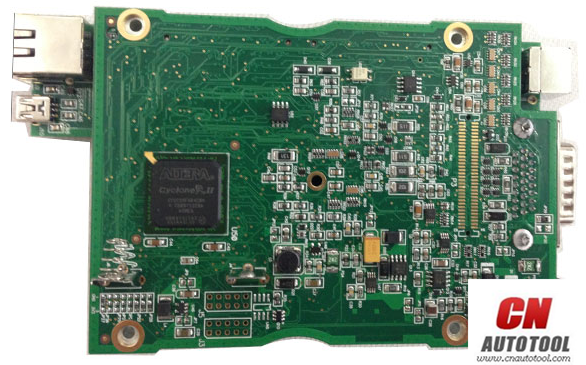
Any differences among wiTech MicroPod SP271, SP271-B and SP271-C?
1. They are made from different factories, so quality differs.
one-to-one relationship between the hardware and software!!!!!!!!!
2. MicroPod 2 SP271-B is the best quality one among these three.
Function the same as original wiTech.
AGAIN, wiTech 2 SOFTWARE LINK ONLY WORKS WITH Sp271-B!!!
PLEASE CHECK YOUR wiTech 2 BEFORE SOFTWARE DOWNLOAD.
Only English?
No,the witech?software used in optional languages, incl. English, French, Spanish, German, Italian, Russian, Japanese, Korean and Chinese.
What systems can be installed run on?
Windows XP is the only O.S.
wiTech 2 clone supports programming?
Yes. wiTECH 2 clone support module programming online.
What can you do with wiTech 2?
The wiTECH diagnostic system is designed to do obdii diagnosis and ecu programming on Chrysler, Dodge, Jeep, and North American Fiat vehicles equipped with CAN BUS technology ( 100 percent CAN coverage for Chrysler, Dodge, Jeep, and Fiat (North America), including  latest 2014 Dodge Ram ProMaster, 2015 Jeep Renegade). It provides the latest technology and significant hardware and software provides cutting edge technology will enable technicians to increase enhancements over the current StarSCAN and StarMOBILE tools. This toe their productivity and provide world-class diagnostic services to your customers.  This tool is very easy to use .The MicroPod 2 is a great OEM dealer diagnostic tool that will give you full access to the vehicles that you are working on.
If your dealership purchased a new microPOD and you would like to convert your existing microPOD for using with wiTECH 2.0 System, you need to download and install the microPOD Setup Utility to configure/setup your microPOD for wiTECH 2.0.
NOTE: microPODs with a serial number beginning with “WFP” should NOT be used with this utility.
PROCEDURE
If you have a restricted network, you must first make sure that all sites listed below are enabled to be able to successfully use microPOD Setup Utility and the wiTECH 2.0 System.
mixpanel.com
bugsnag.com
fcawitech.com
chrysler.com
dealerconnect.com
jeep.com
witechsystem.com
Note: Please disable any Anti-Virus software that you have on your computer in order to allow the microPOD Setup Utility to install and run properly.
How to download and install the microPOD Setup Utility
IMPORTANT: Once the microPOD is configured using the microPOD Setup Utility, all the microPOD Wireless Settings will be deleted. You will be required to follow the instructions from the KB link titled “How to configure a Wireless Profile on a microPOD II”.
To download the application, please login to DealerCONNECT > Service > wiTECH Information > microPod Setup Utility
Step 1
Click on “Run” to begin the downloading process of microPOD Setup Utility.

Step 2
The install wizard will appear to install the wiTECH Driver x64 onto your computer if your PC has not been installed with wiTECH 1.0 application.
If the PC has been installed with wiTECH 1.0 App, you will not see the screen below and proceed to Step 6. Otherwise, click “Next” to proceed.

Step 3
Read the License Agreement carefully, and accept the terms in the license agreement. Then, click “Next” to continue.

Step 4
You are now ready to start the actual installation of the driver. You now need to click on “Install” for it to start.

Step 5
This will now install the wiTECH Driver x64. Once complete, the program will automatically proceed to the next step.

Step 6
Once the installation has completed, click “Finish”. Proceed to the following section, “Using the microPOD Setup Utility”.

Using the microPOD Setup Utility
NOTE: Please make sure that your computer is connected to the internet and the microPOD is connected to the computer via USB before starting this process. This application will help you configure your microPOD for wiTECH 2.0.
Step 1
Start microPOD Setup Utility by clicking the icon on the desktop:

If the microPOD Setup Utility that is installed is out of date, you will be forced to update to the newer version of the application.
Step 2
Please make sure your microPOD is connected to the PC via USB.

Step 2a
If you see the following screen you may not be connected to the internet, or have a firewall that blocks 1 or more of these websites.

Select “Continue” on the next screen for wiTECH 2.0 at  CnAutotool.com Device Setup and Configuration.

NOTE: If you only want to configure the wireless setting on a microPod device to use with wiTECH 2.0, click “Wireless Configuration” and follow instructions.
Select “Continue” on the next screen to begin attempting to connect to the microPOD device.

Step 3
Once your microPOD II is recognized by the utility, select “Continue” to proceed with the configuration.

NOTE: microPODs with a serial number beginning with “WFP” should NOT be used with this utility.
Step 3a
If the utility does not find the microPOD device, please assure that the microPOD is connected via USB and click “Refresh”

Step 5
The following screen will appear for up to 15 minutes while the microPOD device is being configured.

Step 6
The following screen will appear when the utility completed the configuration of microPOD for wiTECH 2.0 Application.
Note: After Car Diagnostic Tool microPOD Setup Utility is ran, all existing wireless networks will be removed from the microPOD. To configure wi-fi on your microPOD please click on “Wireless Configuration” button.

Important! Leave the microPod Setup Utility window running as you will be required to complete software updates to the microPod device before configuring the wireless.

Step 6a
Login into wiTECH 2.0. The microPOD II that was just configured using the microPOD Setup Utility should appear in the wiTECH 2.0 discovery. You will need to update the operating system of your microPOD II before it can be used with wiTECH 2.0. Click “Continue”, and your web browser will redirect you to the page to download and install the operating system update as seen in the following step.

*NOTE: If microPOD II does not show up in discovery after a couple of minutes please power cycle your microPOD II by unplugging it and plugging it back in.
Step 7
Click “Update Now” and your microPOD II should continue to the update screen. Once updating, do not interrupt your microPOD II at any point until the update is complete.

*NOTE: This can take upwards of 9 minutes. It is normal activity for the microPOD II to reboot.
wiTECH-MicroPod-II-setup (17)

Click “OK” and you will be navigated back to the wiTECH 2.0 discovery page. Your microPOD II should appear updated and ready for use.


Step 9
With the microPod Setup Utility still running, configure wireless on the wiTECH microPod II device.
http://autotool.biz/2017/09/05/chrysler-diagnostic-tool-v17-03-01-witech-micropod-2/

Sunday, September 10, 2017

What is funtion of Porsche Piwis II Engineering Mode ?


Piwis II Porsche diagnostic tool, Porsche Piwis 2 with regular version and Piwis 2 engineering mode, what’s the Piwis tester ii developer mode spcial? what can the Porsche piwis II engineering mode do? Here eobdtool.com share PIWIS II developer mode function as following help to customer choose it.
The software version is:V18.100
Piwis Tester II Support Systems:
ENGINE automatio transmission, air-conditioner, SRS, ABS, ASR, MPL, GM, Original antitheft System,KEYLESS GO system, OBDII system.

What is funtion of Porsche Piwis Tester II Engineering mode ?
1. Start/stop”LAST MODE”wait for stopping the engine and change memory
2. Spoiler”lessen time when the car starts
3. Spoiler”fixed”
4. Spoiler”change angle”
5. Change VO code
6. Close Air Mercury
7. Upgrade power
8. Remove the tire pressure sensor
9. Install reversing camera
10. Install USB/BT
11. Close the seat belt warning
12. Change CDR/PCM operation interface
13. Air condition memorization
14. Start CDR_AUX
15. Open the PCM function
16. Manually set codes
17. Automatically set codes
18. Manually do programming
19. Automatically do programming
PIWIS IIDeveloper Mode software display:


Piwis Tester II Vehicle Coverage:
1. 911(997) (991)
2. Boxster/Cayman (987)
3. Cayenne up to MY 2010
4. Cayenne from MY 2011
5. Panamera
6. Support 2013 year for Porsche car models

Saturday, July 1, 2017

Change Autel MaxiSys Pro MS908P from Spanish to English

If your Autel MaxiSys Pro MS908P diagnostic scanner global version comes with Spanish in default, you can follow CnAutotool.com guide to switch language from Spanish to English.
1.First of all,  the language of the Android Tablet need to switch from Spanish to English.
Double check System setting —- language —-English
http://forobd2tool.com/wp-content/uploads/2017/06/30/1-1.png
2.The language of Diagnostic Program need to change.
To change the language from Spanish to English.
Step 1: Click on Autel Maxisys.
http://forobd2tool.com/wp-content/uploads/2017/06/30/1-2.png
Step 2: Click on “Settings”.
http://forobd2tool.com/wp-content/uploads/2017/06/30/1-3.png
Step 3: Click on “ Language”
http://forobd2tool.com/wp-content/uploads/2017/06/30/1-4.png
Step 4: Select “ English”
http://forobd2tool.com/wp-content/uploads/2017/06/30/1-5.png
Then you can see that the Autel MS908P language is in English now.
http://forobd2tool.com/wp-content/uploads/2017/06/30/1-6.png
After changing language to English and if you found it is blank here(Maxisys—Diagnostic).
http://forobd2tool.com/wp-content/uploads/2017/06/30/1-7.png
Please go to Update and select vehicles software and reload them.
http://forobd2tool.com/wp-content/uploads/2017/06/30/1-8.png
http://forobd2tool.com/wp-content/uploads/2017/06/30/1-9.png

Saturday, June 24, 2017

Free download the latest BMW ICOM Next software 05.2017 ISTA-D 4.04.31 ISTA-P 3.61.4 (Expert Mode) and ETK-KSD-RS


Free download ISTA-P 3.61.4.002 on Mega
https://mega.nz/#F!IshE3SAY!fQS9sPVpIXHkyF_VKn-lTg
– not tested, try on your own risk
Free download BMW ISTA-D 4.04.31 Standalone + SQLiteDBs EN-DB V4.04.31 + Tool
https://mega.nz/#F!4Msz2RgL!jvZdlqN3SF75Z5rIRnWnYg!tZtkABRY
– not tested, try on your own risk
Now the softare of BMW ICOM was updated to the lastest verison:
2017.05
Software Version:
ISTA-D 4.05.20
ISTA-P 3.61.4.002
VIN: 2017.05
Not connected 9000 days remaining
BMW ETK: 2017.5
BMW KSD 04.2017 Multilanguage
With free BMW Engineer Software (INPA, NCS, WinKFP, E-Sys 3.27.1, Psdzdata 61.2.002), BMW FSC code generator and BMW AiCoder
BMW ICOM Next ISTA-D 4.04.31 ISTA-P 3.61.4 System requirements:
Operating system
  • Windows 7 (32-bit or 64-bit)
  • Windows 8 or 8.1 (32-bit or 64-bit)
  • Windows 10 (32-bit or 64-bit)
Hardware requirements
  • Processor (CPU): min 2.2 GHz Dual Core or 4.4 GHz Single Core CPU (Summary of Cores or Threads should be more than 4.4 GHz)
  • Memory (RAM): min 4 GB
  • Hard drive (HDD): min 195 GB free space on disk C: before installation
Interface requirements
  • BMW ISPI ISTA+: Genuine or clone ICOM A1, A2 or A3, ICOM Next A, ENET cable, K-Dcan cable
  • BMW ISPI ISTA-P: Genuine or clone ICOM A1, A2 or A3, ICOM Next A,BMW ICOM Next


2017.05 ISTA-D 4.04.31 ISTA-P 3.61.4 Information:

BMW ISTA+ 4.04.31 (also called ISTA, ISTA-D or Rheingold)
  • Module (ECU) errors reading and clearing
  • Gearbox (transmission) and engine adaptations erasing
  • Fuel injectors control, correction amount real time viewing, injector registering
  • Engine mountings testing
  • Mass air flow (MAF) testing and registering. Whole air system testing
  • EGR system control and testing
  • Turbocharger and related components control and testing
  • Diesel particulate filter regeneration (DPF)
  • Battery replacement
  • Oil change and service interval reset
  • Wiring diagrams, live data, repair instructions, technical documents etc
  • Programming, vehicle retrofit, mirror coding, FSC codes adding or updating etc
  • And many more other functions
BMW ISTA-P 3.61.4.002 Multilanguage + Expert Mode (single module programming)
  • Battery type change
  • Module (ECU) software updating, coding and replacement
  • Vehicle retrofitting, options enabling and disabling
  • Choose ISTA-P language directly from ISTA-P taskbar agent
  • And many more other functions
BMW KSD 05.2017 Multilanguage
  • Working/labor hours
  • Technical data
  • Service information
  • Defect codes
  • Service & repair packages
  • Approved wheel/tyre combinations
  • Recommended summer and winter tyres
  • And other functions
BMW RSD 09.2016 Multilanguage
Commercial and technical service data for repair and maintenance of BMW Motorcycles
  • Working/labor hours
  • Technical data for motorcycle
  • Service information
  • Defect codes
  • Description of devices and tools
  • Process of removal, installation of bike parts and mechanisms
  • Service & repair packages
  • Approved wheel/tyre combinations
  • And other functions

ISTA-P 3.60 Car List:
can be dealt with using ISTA/P:
E Series·
F, G and I series (will be switched off gradually from ISTA/P 3.62.0 on)·
F, G, I Series (ISTA 4, ISTA/P)
Series group I level
F001 (F0x, RR4, RR5) F001-17-03-505
F010 (F06, F1x) F010-17-03-505
F020 (F2x, F3x, F80, F82, F83, F87) F020-17-03-505
F025 (F15, F16, F25, F26, F85, F86) F025-17-03-508
F056 (F4x, F5x, F6x) F056-17-03-507
S15A (G1x, G3x, RR1x) S15A-17-03-507
S15C (G38) S15C-17-03-506
I001 (I03, I08) I001-17-03-507
I levels correspond to the ISTA Service Data version on the front page.
E Series (ISTA/P)
Series group I level
E065 (E65, E66) E065-15-07-500
E060 (E60, E61, E63, E64) E060-16-11-500
E070 (E70, E71, E72) E070-16-11-500
E89x (E81, E82, E84, E87, E88, E89, E90, E91, E92, E93) E89x-16-11-500
R056 (R55, R56, R57, R58, R59, R60, R61) R056-17-03-504
RR01 (RR1, RR2, RR3) RR01-17-03-500

ISTA-D 4.04 ISTA-P 3.60 Review:
I have installed it without any problems…
Me to without any error no problem
sometime download from mega file is corrupted and if you download with megadownloader files get corrupted all the time.
try download it again maby that will help.
Also no error here – Working perfect
With me runs very well.

Saturday, June 17, 2017

GM MDI GDS2 Tech2Win V8.3.103.39 Support GM Vehicles Update to 2018

The latest GM MDI GDS2 Tech2Win software V8.3.103.39 for Vauxhall Opel Buick and Chevrolet comes in Windows 7 SATA format HDD.
Software Version: V2017.2.0
System: Windows 7 64bit
http://forobd2tool.com/wp-content/uploads/2017/06/14/1-1.jpg
http://forobd2tool.com/wp-content/uploads/2017/06/14/1-2.jpg
http://forobd2tool.com/wp-content/uploads/2017/06/14/1-3.jpg
http://forobd2tool.com/wp-content/uploads/2017/06/14/1-4.jpg
Update time: GM Global V2017.2.20
Used for: Both China GM MDI USB version and GM MDI WiFi version scanner
Easy to use: Insert the HDD with GM MDI gds2 software into your computer; the software can be used directly with the GM MDI scanner from CnAutotool.com, which doesn’t need activation by users.
GM MDI Multiple Diagnostic Interface scanner will provides the full dealer level diagnostics and programming for all Vauxhall /Opel 16 pin vehicles from 1996 to 2017, support Chevrolet up to 2018. The GM MDI scan tool diagnostic software gds2 can be installed on 2.5′ SATA HDD,  with the Win7 Operation System.
Attention please!
* Please make sure your computer supports Win7 64 bits system.
* Computer system requirements: the year after 2008, 4GB RAM
* If computer failed to boot up, please enter BOIS system and change the SATA driver to AHCI.
Recommended  Best quality GM MDI Interface with WiFi card:
http://forobd2tool.com/wp-content/uploads/2017/06/14/1-5.png
http://forobd2tool.com/wp-content/uploads/2017/06/14/1-6.png
http://forobd2tool.com/wp-content/uploads/2017/06/14/1-7.png
http://forobd2tool.com/wp-content/uploads/2017/06/14/1-8.png
WiFi GM MDI Interface + V8.3.103.39 GDS2 Tech2Win SATA HDD Windows 7

Monday, June 5, 2017

DigiMaster-IIIYanhua Digimaster 3

Professional vehicle diagnostic instrument digimaster III D3 First Odometer Correction

In contrast with digimaster II, digimaster iii(digimaster 3) could be the 3rd era muti-functional auto knowledge changing products bases on a higher general performance hardware platform which normally takes high-speed CPLD as well as the ARM11.

diaimaster III Odometer correcton resource

DigiMaster III Audi A8L 2003-2008 obd code reader meter adjustment (new edition):

one, Audi A8L 2003-2008 OBD meter adjustment(new edition)

two, Skoda 2007-2010 incorporate the purpose to inquiry standing from the IMMO.

three, Volkswagen NEC 95320 vehicle key match module include the perform of clearing fault code.

Yanhua Digimaster 3 Full Update Heritage:

It incorporates a significant functionality components platform Renault CAN Clip V117 which will take high-speed CPLD as well as ARM11 processor as being the main engineering. Working with many types of adapter you are able to very easily realize odometer correction,Audio decoding,airbag resetting,engine Eu resetting,IMMO, programming crucial for Benz &BMW etc.It consists of the advanced technological know-how of programming new keys for BMW and Benz, CAS-BDM reading/writing and resetting, 35080V6 erasure etc. large numbers of hitag2 crucial programmer pictures and particular description makes your operation pleasant.

Note :

Digimaster 3 (D3) includes all functions of Digiprog3 (DIGI3)!
Besides, D3 adds the Benz/BMW/Porsch vital programming purpose. Also D3 supports to adjust the instrument on BENZ new models via OBDII diagnostic connector directly, such as W221, W164, W251, W216, W204, W212.

For newly updated cars, you maybe need buy the tokens in this link: Digimaster 3 digimaster iii .

Sunday, May 21, 2017

Ford VCM II PCM Programming Steps


Ford/Mazda VCM II 2 in 1.One device support both Ford and Mazda till 2015 year.Latest software: Ford V96,Mazda V95.Perfect replacement for Ford VCM 2.
Ford VCM II PCM Programming Steps
1.Start the software.

2.Select the vehicle specification.

3.Choose Module Programming.

4.Choose “Programmable Parameters>>Car configuration”

5.Enter the VIN number.

6.Retrieve the vehicle configuration data.

7.Set the ignition switch to on.

8.Set the ignition switch to off.
9.7 and 8 step again.